In the next part of creating a simple python package, I figure out how to enable continuous integration with Travis CI on the minimal python package which I started a couple days ago.
In software engineering, continuous integration (CI) is the practice of merging all developer working copies to a shared mainline several times a day.
Travis CI
While discussing good software practices with people, I often hear about Travis CI or see a “.travis.yml” file in a GitHub repo.
According to Joshua Anderson (stackoverflow, 2014), Travis CI will run your program’s tests every time you commit to GitHub, which will quickly tell if your commit was okay or the commit broke something and you need to fix it before it becomes a problem.
Using Travis CI
To get started with Travis CI, you do the following:
- Sign in to Travis CI with your GitHub account
- Enable repos (on the profile page) to use Travis CI
- Add a
.travis.ymlfile to the repos (to tell Travis CI what to build) - Trigger your first build with a git push
- Check the build status page to see if your build passes or fails
Specifying the “.travis.yml” file
Looking in the python specification of .travis.yml, to use Travis I (1) specified the Python version, and (2) specified the command to test the software.
language: python
python:
  - "2.7"
# command to run tests
script:
  - python tests/hello.py
Here python tests/hello.py is the test to be ran, and the content of this script is:
print("Hello world from Travis CI")
Checking Travis
Once Travis is setup (with the tests and the .travis.yml file), you can look in Travis to check the status of the tests.
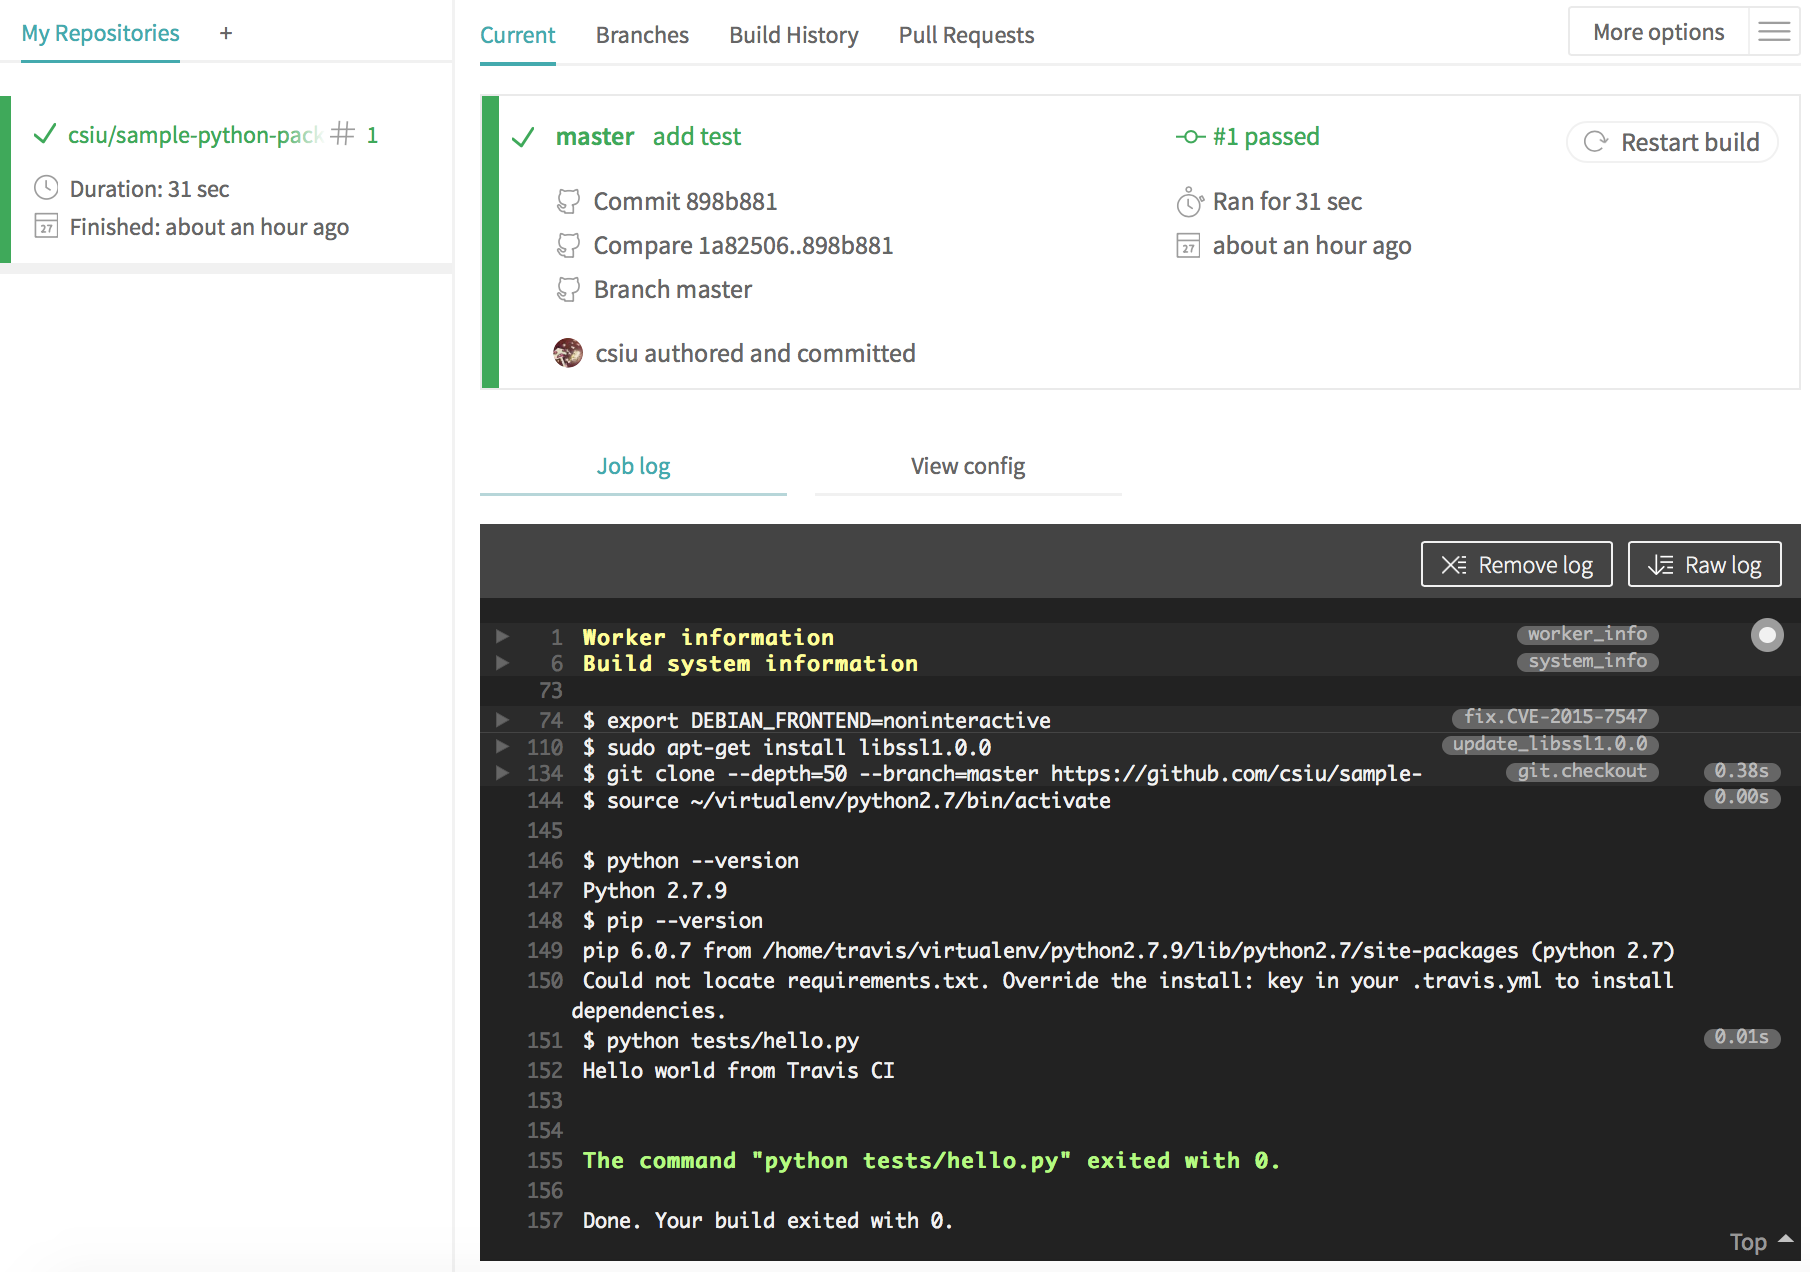
Here we see the script “tests/hello.py” has ran successfully.